
Before you read on, make sure you have Task as an integration option in your Zapier account, and connect Zapier to your Task account.
You will now have Task available as a Action Option in any Zaps you create. That means you can use Zapier to create tasks inside any project. From the action page when creating a Zap you will see:
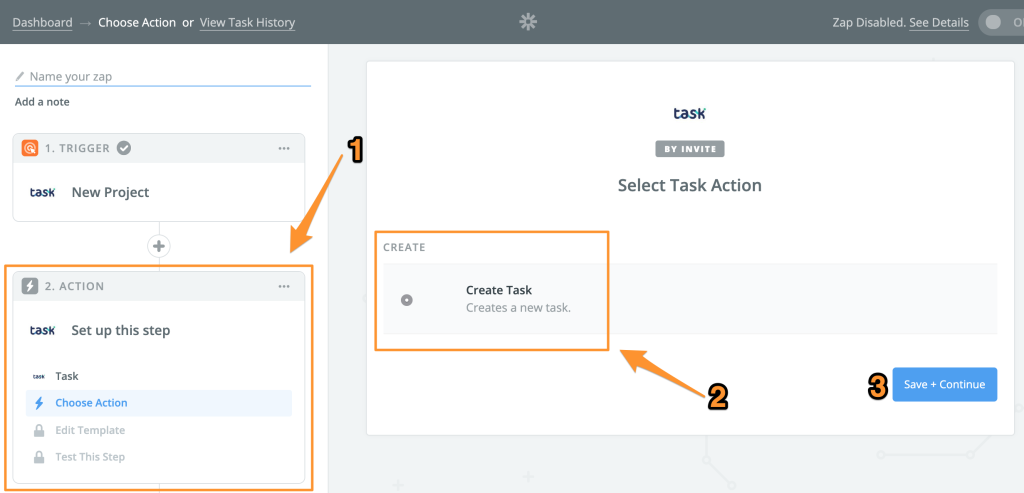
- Action step
- Option to “Create Task”
- Save and continue
The next page asks you to select the Task account you have connected to your Zapier account. Select your Task account and click continue.
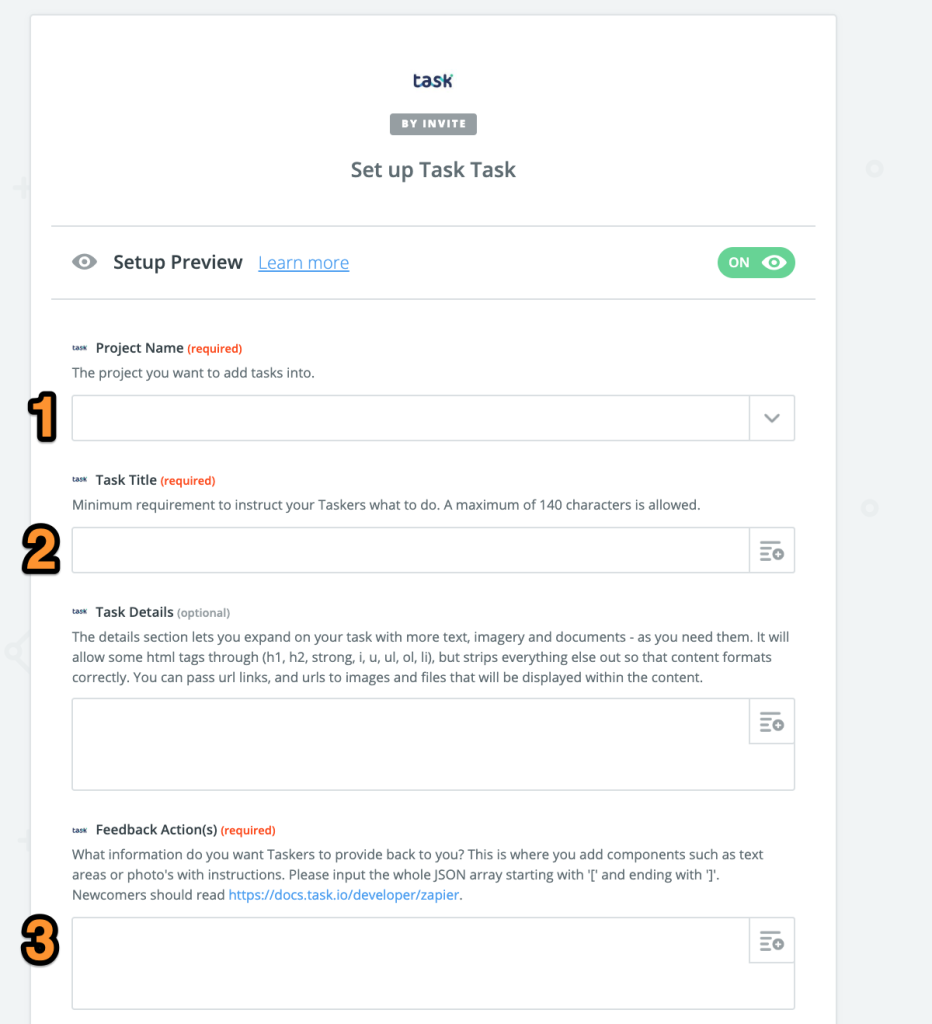
The 3 required fields when you setup Task creation are:
- The project name (which project you’ll be adding tasks to)
- A title for the task
- The feedback actions you want the Tasker to perform
This is the absolute minimum you’ll need to create tasks. There are many other configuration options, and we will not cover them here – there are plenty of help notes inside the Zapier interface to help you out.
Adding feedback actions
However, critical to your understanding is how to add the feedback actions – that is the data you’d like Taskers to provide you when they complete the task.
The easiest way to do this is to use the task builder to create a task, save it – and then examine the JSON. Here you can see I have created a task that has text area and image feedback components:
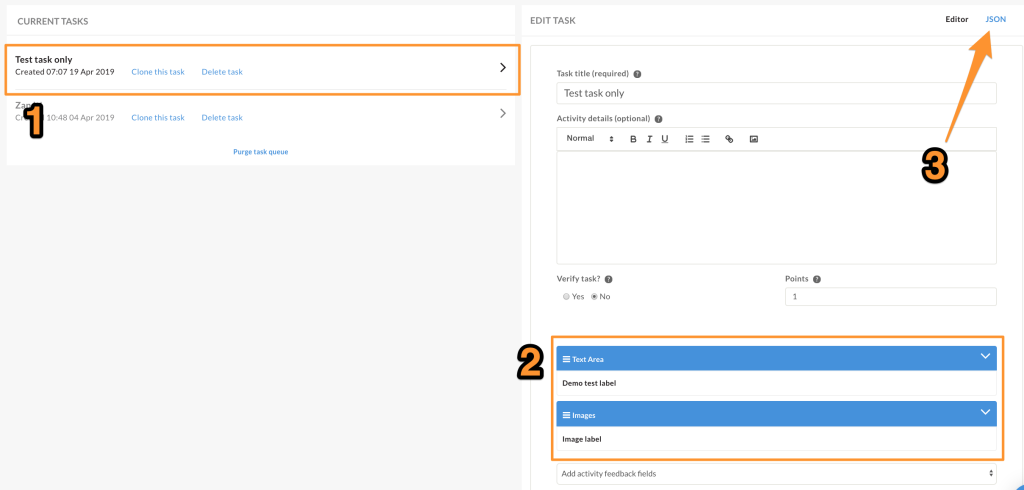
- I have selected the task I created that has the feedback components i would like
- You can see the feedback components
- You click the JSON link to switch off the editor
Scroll down the JSON data that makes up your test task until you reach “components_attributes“
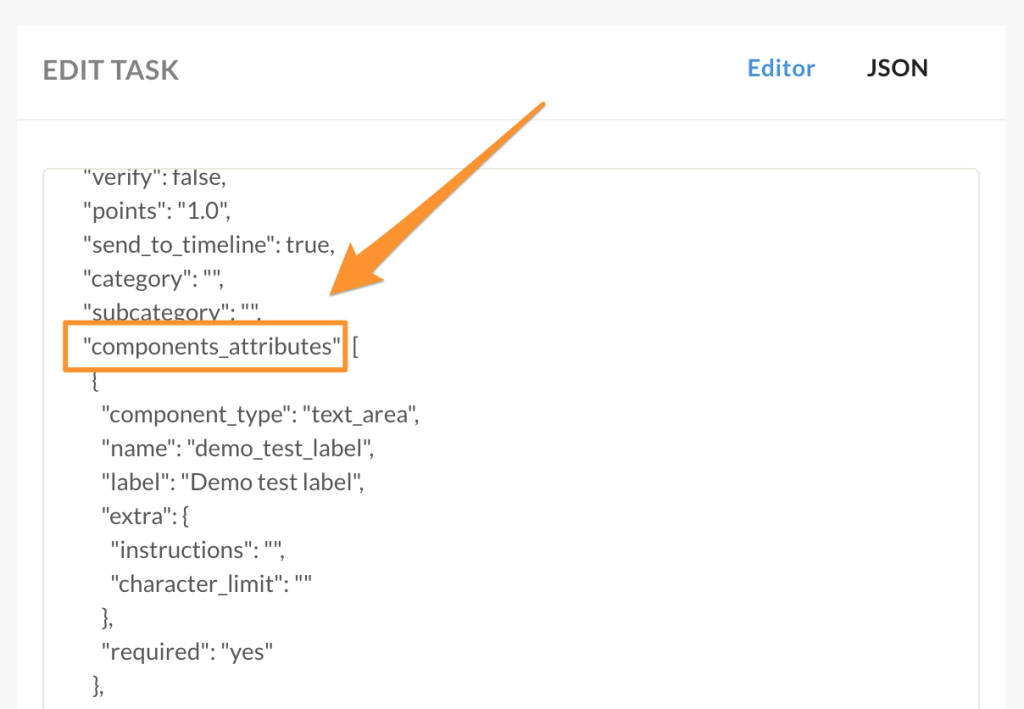
You will now copy the opening square bracket to the closing square bracket, in my example it would be this:
[
 {
 "component_type": "text_area",
 "name": "demo_test_label",
 "label": "Demo test label",
 "extra": {
 "instructions": "",
 "character_limit": ""
 },
 "required": "yes"
 },
 {
 "component_type": "media",
 "name": "image_label",
 "label": "Image label",
 "extra": {
 "media_types": "photo",
 "instructions": "",
 "media_limit": "10"
 },
 "required": "yes"
 }
 ]
Paste the code you have generated – including the beginning and end square brackets – into the “Field Actions” text area in Zapier. Any task created using this Zap will then use the feedback actions you have defined.