
Even though you could use the Distributor account that was setup in the previous step, we recommend highly that you define an account that holds funds specifically for your project.
Also, remember – Task works with *any* Stellar-based token – you can choose to use any existing Token, you don’t have to create a new one each time! So you could just move existing tokens into an existing wallet you have and use that, however this tutorial is designed to get you setup as a first time token creator.
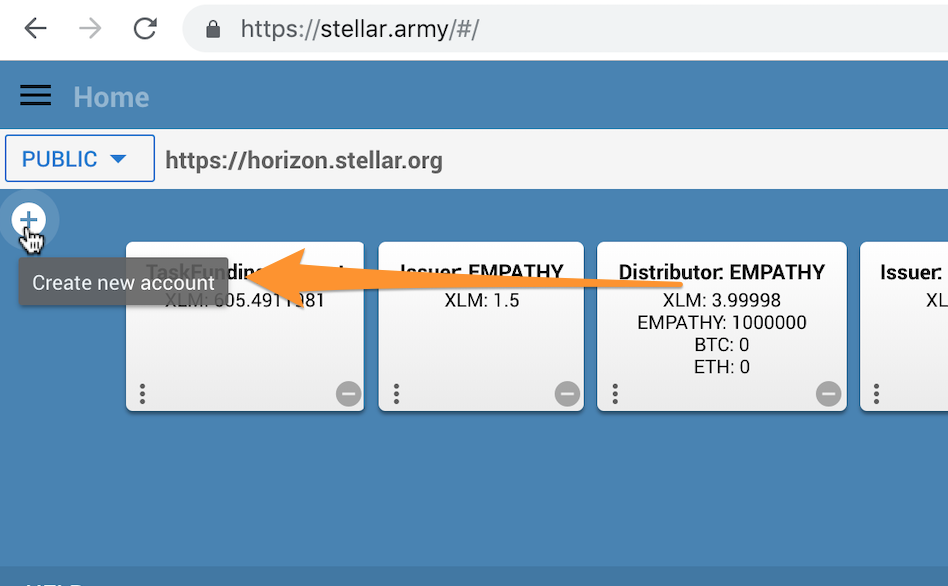
We will use Stellar.army to move some tokens from our Distributor accounts into an account we will use to fund the Task project.
Create the new account
Click create a new account, and select “Create New Account” from the popup:
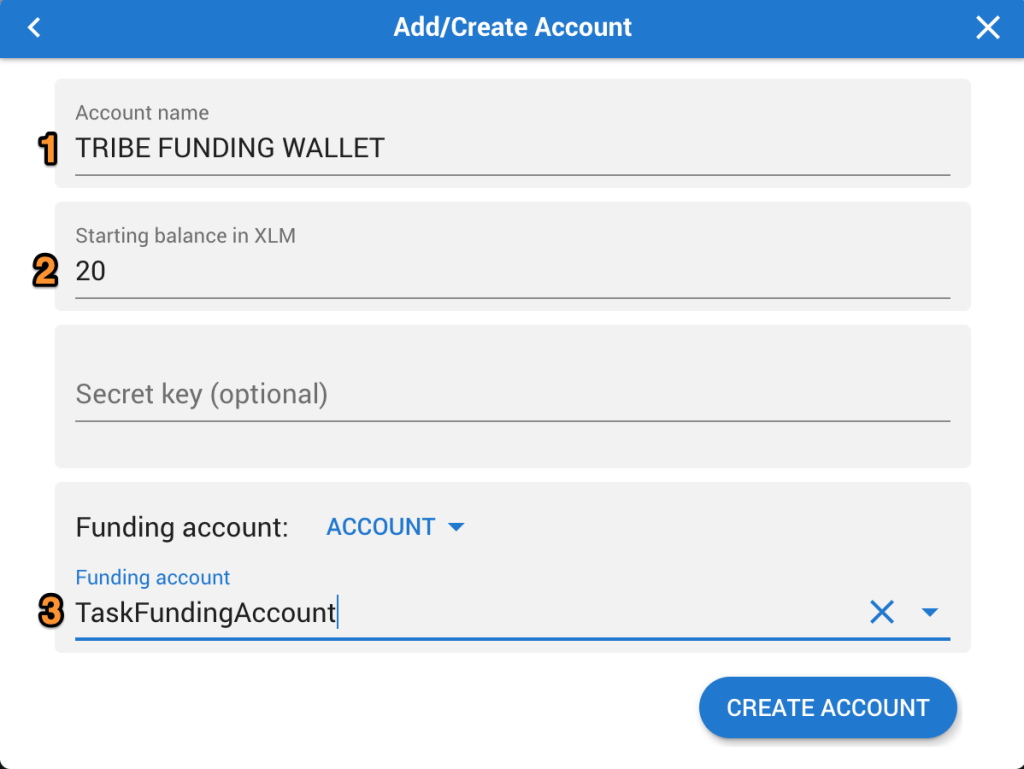
Next you will:
- Give the account a name that will help you identify it
- Provide some Lumens – you need this in order to pay for the transactions you action from this account
- Define the account to fund this (i.e. the account that will supply the Lumens)
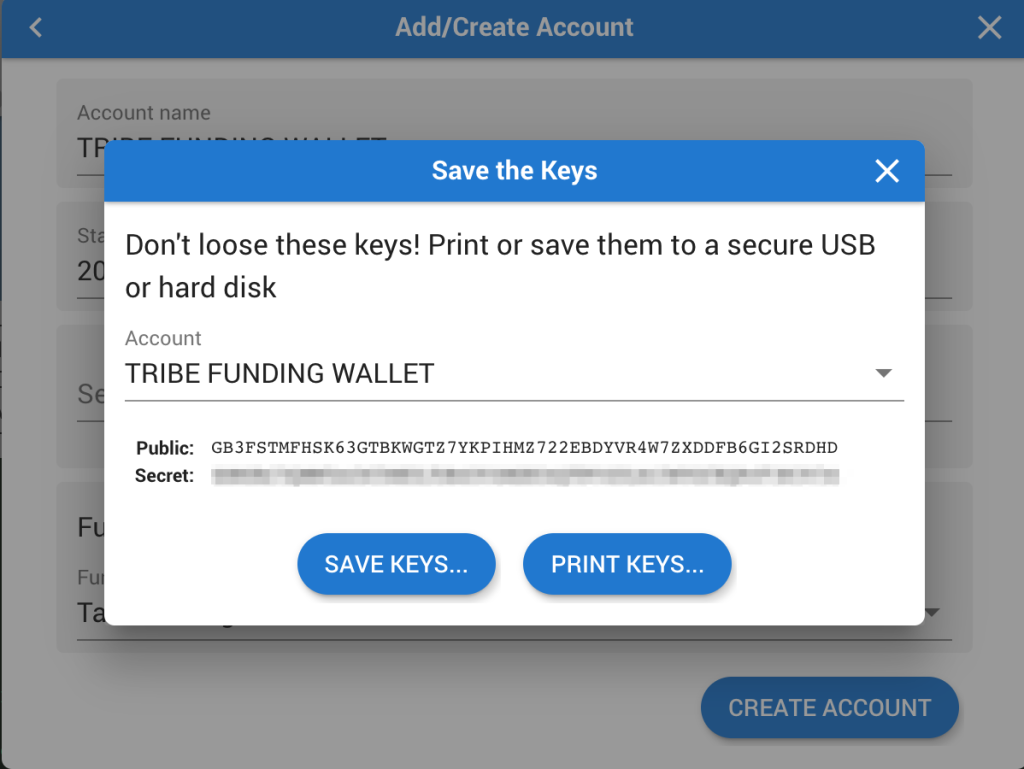
Your account is created – the “Wallet” you’ll use inside Task is defined – securely note down your wallet keys.
Allowing “trust”
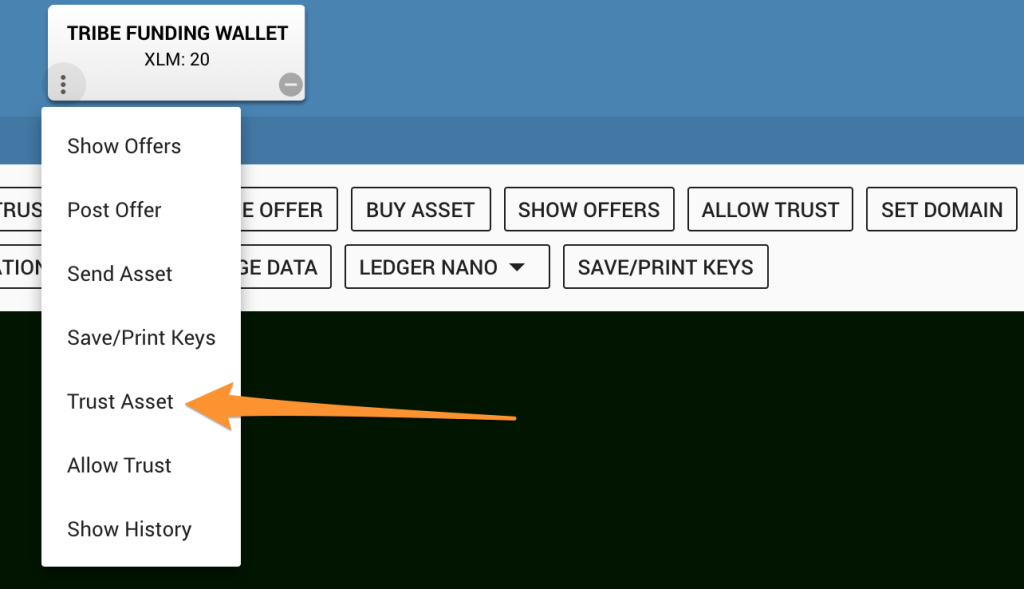
You need to setup “trust” in your new wallet – i.e. tell the new wallet you just created to trust the asset you just created so that your wallet will accept them. This stops people spamming their tokens to any wallet without permission.
Click the options on the new account we setup for your funding wallet, and select “Trust Asset”:
To define trust, specify:
- The source account that will accept the asset
- The asset (in our example, the TRIBE token)
- A trust limit
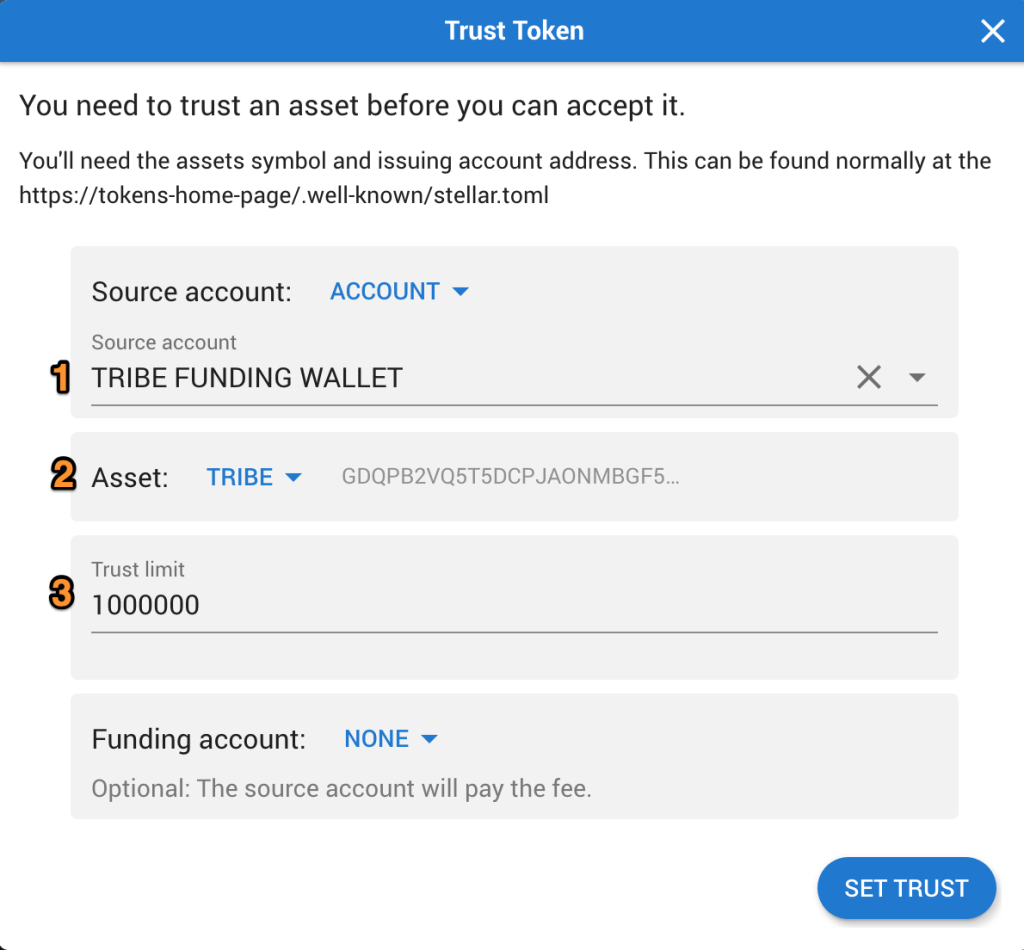
You should see a success message letting you know trust has been setup.
Fund your wallet with tokens
Finally, your wallet is no good without some funding! Let’s now send some tokens from your distributor account to your wallet you will use for your project.
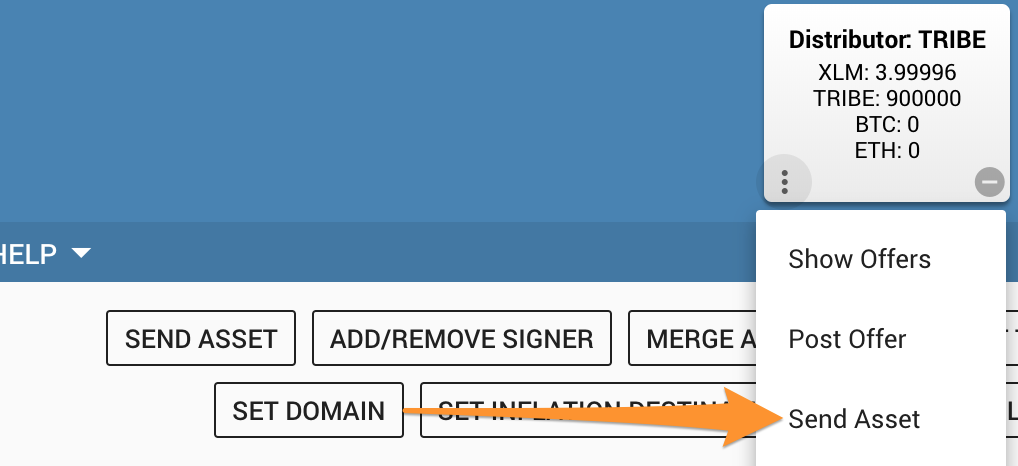
Select the options menu on your Distributor account and click “Send Asset”:
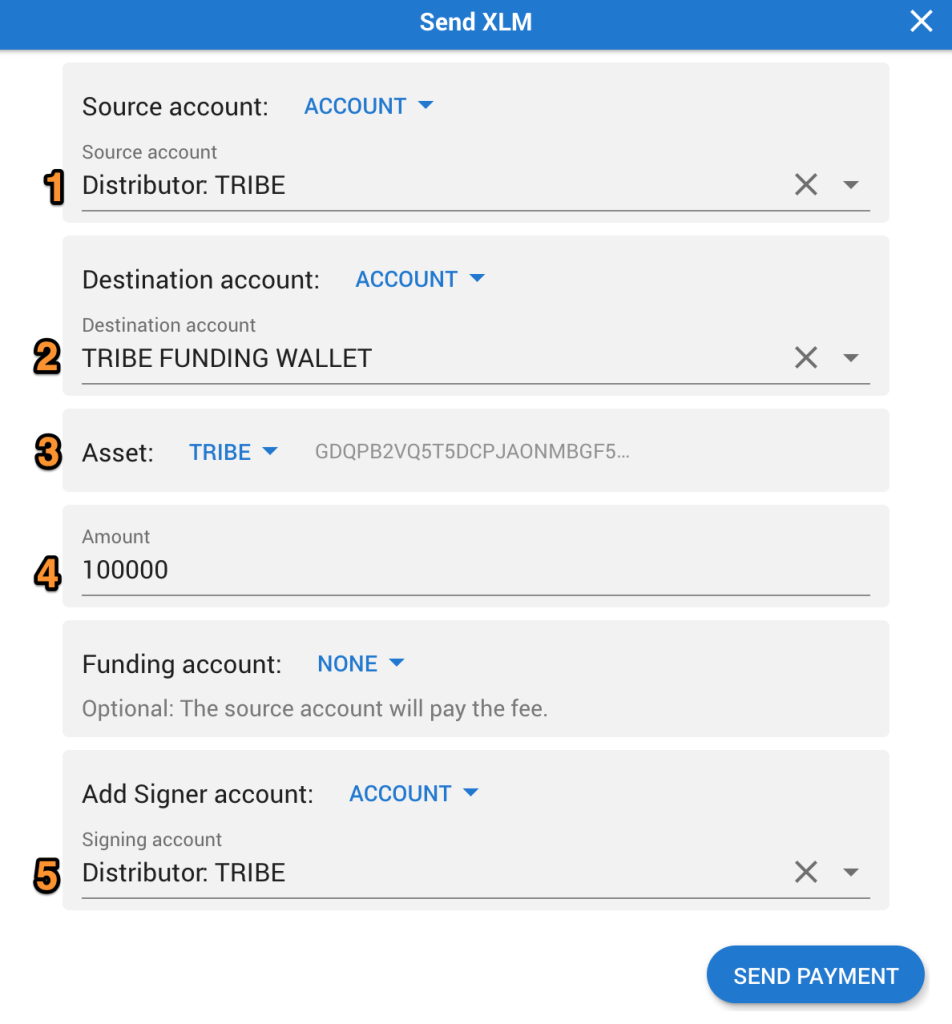
In the “send a payment” box, note the settings:
- The source account is your Distribution account that holds your tokens
- You are sending them to your new wallet as the destination
- You choose your token
- Define the amount of funding to send
- Set the “signing account” to be the Distributor account of your token
You now have a funding wallet for your token! You can see in my example I now have 100,000 TRIBE tokens ready in my wallet.

Now it’s time to setup the Task project to use this token for payments.