
The Task Desktop wallet has a “Test mode” – which when enabled, uses the Stellar Testnet and not the public network. This is important for testing and learning, and means you can create NFTs without any fees.
IMPORTANT – the Stellar Testnet is reset every 3 months, so please remember any work done in Test mode will be erased!
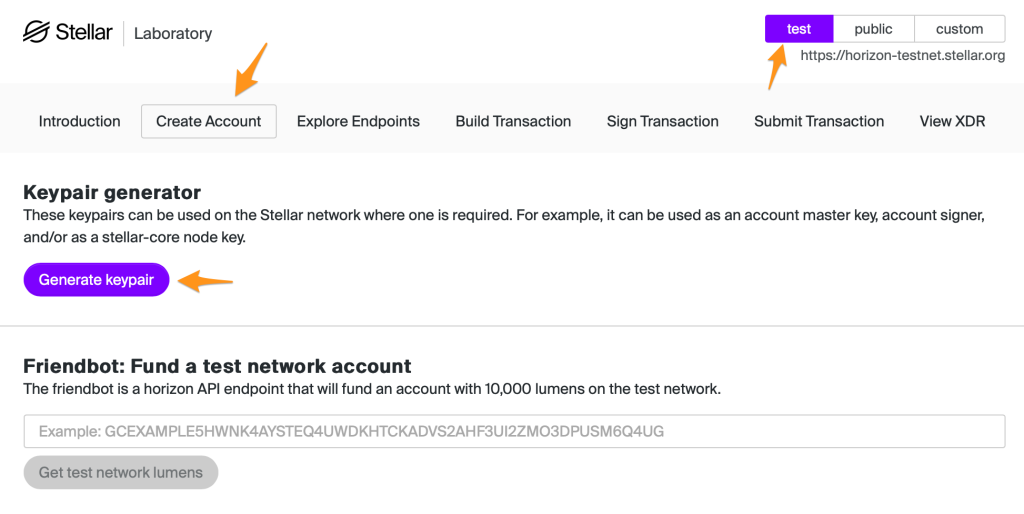
Creating your Testnet account on Stellar
Head over to the Stellar Laboratory – this link should take you to the “Create account” page with the network set to “Testnet”.
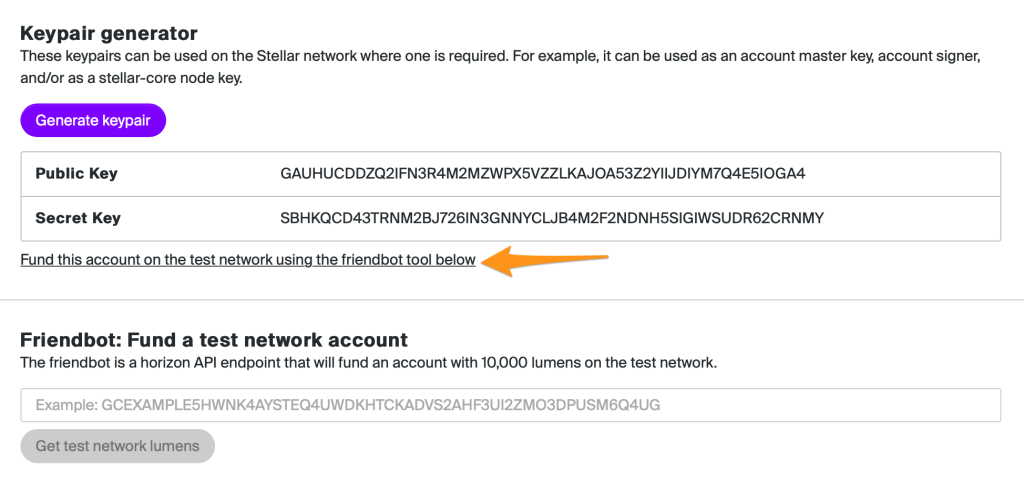
Click “Generate keypair“
Click the link “Fund this account on the test network using the friendbot tool below“
Click the button “Get test network lumens“
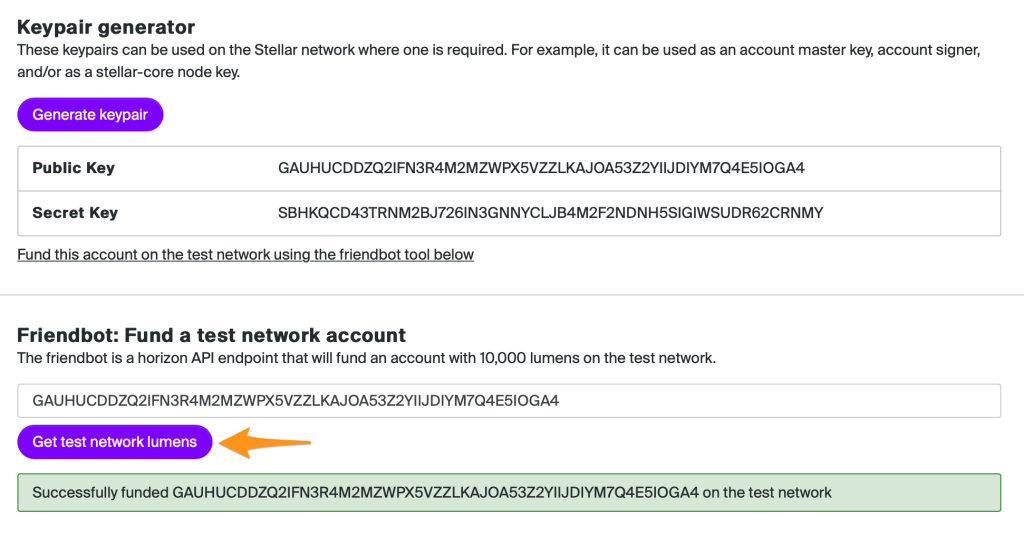
You know have a new Stellar account on the Testnet with lots of test Lumens to play with 🙂 Save both the public and private key!
Switch your Task wallet to use the Testnet
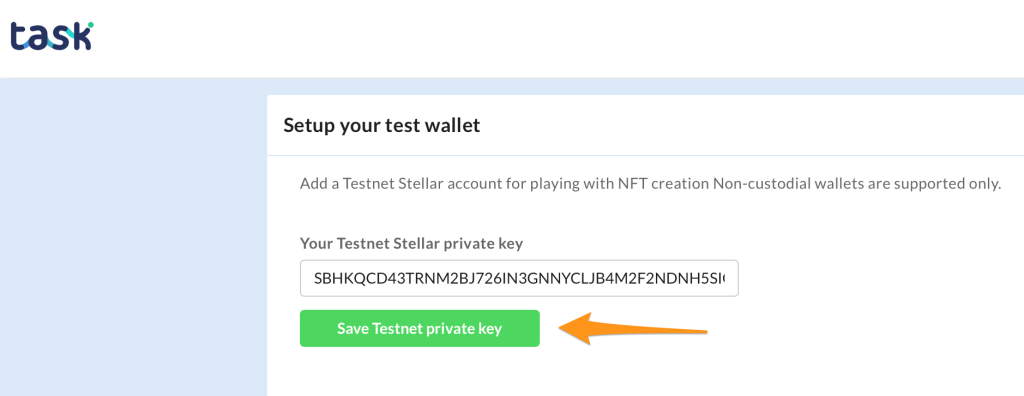
Navigate to your Task wallet in the Desktop and look for the
…
Paste in your Private Testnet Key created above (Begins with S), and click “Save Testnet private key“
You will see your test lumens displayed – and you can now create test NFTs using this account.
Click the “Public network” link in the wallet when you want to return to your real wallet!